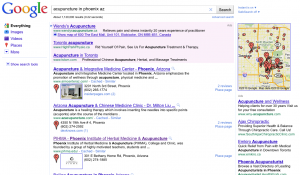
When you search for a service in a geographically specific area – like massage therapy in San Diego, or a chiropractor in Miami – Google returns a different type of result, showing a map marked with the location of practices in the area, instead of just the usual search results. The service is called Google Places, and we mentioned it here, including a video for getting started, back when it was called Google Local.
Why This Matters For Your Practice
These types of results are becoming more and more prominent. As soon as Google realizes you’re looking for something local, it switches the results you get, offering up a map and a series of local listings, much like a yellow pages directory on steroids.
Although less than 10% of the visitors to our clinic website last month came from Google Places, I think that as a general rule, they’re good visitors – the kind of “qualified” traffic that turns into paying clients.
Also, we’re not in a dense, rural area, and our site ranks quite high in general – for many people, a good Places listing could deliver clients who might never find you otherwise. If you’re not on Google Maps, or having trouble showing up in Google searches for your area, a Places listing might be just what you need.
Starting and Tweaking Your Practice Listing on Google Places
This takes very little time to get going. You can get through the basics in 10 minutes, no problem.
1. Head to Google Places and start the process. If you want more info, or detailed help, there’s an easy checklist here.
2. Set up a Google account, if you don’t have one. If you already have a gmail address, you’re set.
3. Fill in the basics for your practice profile. This is pretty straightforward – you set up your contact info, hours, business category, upload photos if you like.
4. Verify your listing. This is Google’s way of making sure you’re who you say you are, and not just some stranger claiming to own your practice. Depending on where you live, you may have up to three options for doing this: by phone, mail, or text message. They’re all easy, and you’ll need to do one of them before your listing goes live.
5. Tweak Your Profile and Check Your Stats
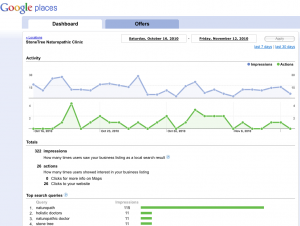
When your info goes live, you’ll be able to view the stats for how many people have viewed your Places listing, and how many have clicked on it, as well as the top searches that have resulted in your listing being shown. You can also list events, and create offers (coupons) for people who find you via Places.
Try to add information to all the fields. One of the keys to having a successful Google Places listing is to try to have your business profile complete, and to have reviews from your clients/patients.


Hey Dan -great tip, wanted to send along an update regarding this blog. I followed the above instructions for our Barrie Clinic location (Dr. Rallis Wellness Group) and in one month received over 250 new hits (google analytics) and several new patients (for about 10 minutes worth of work)!! Awesome tip -thank you pal!